
Flexible Packaging Film Problems: A Troubleshooting Guide
Film defects can cause scrap, leaks and repeat downtime. Locate the failure and preserve comparison samples before choosing a test or changing materials.
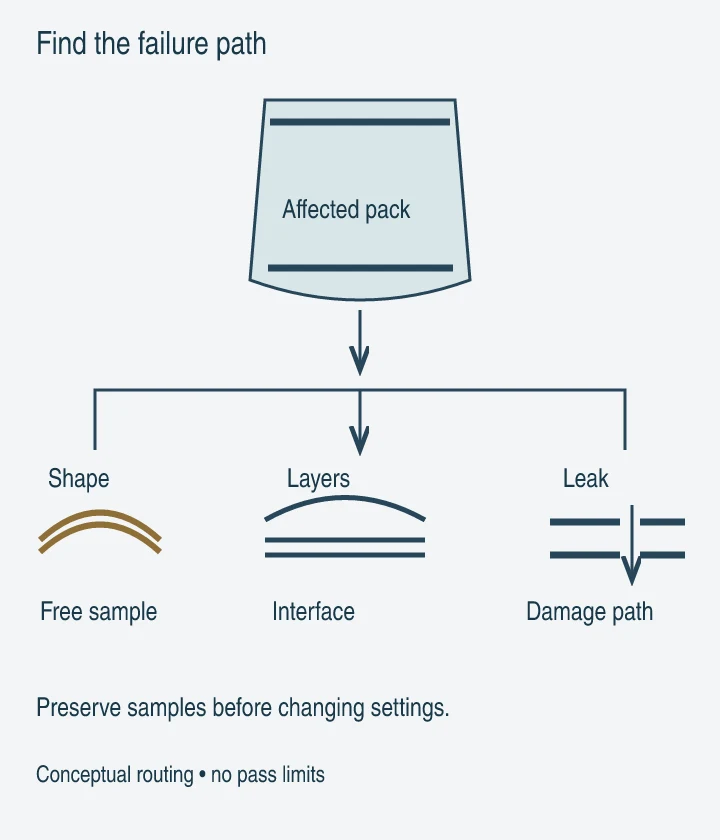
Misdiagnosing a film defect can waste another roll and leave leaking packs in production. Start by locating the failure, preserving a comparison sample and recording when it first appears; then choose a test that distinguishes the possible causes. A symptom identifies the investigation, not the conclusion.
This guide covers material, laminate, barrier and seal symptoms across packaging formats. It does not prescribe machine settings, release suspect product or supply a universal pass limit. Use the approved film specification and the responsible quality team’s test plan to decide whether a result is acceptable. For the equipment-specific investigation, continue to machine compatibility.
Quick diagnosis: match the symptom to the next check
The checks below are investigation routes, not confirmed causes. Keep unopened roll samples, converted empty packs and affected filled packs separate so that the stage introducing the problem remains visible.
Scroll horizontally to view all columns if needed. ↔
| Symptom | Question to resolve | Useful comparison | Next owner |
|---|---|---|---|
| Web curls after unwinding | Does curvature change with conditioning? | Free samples with direction and layer sides marked | Converter or film supplier |
| Layers lift or separate | At which interface did the bond fail? | Affected laminate and retained acceptable lot | Converter and adhesive specialist |
| Haze or bubbles | Is the change optical, interfacial or product-related? | Before filling, after filling and after storage | Converter and quality team |
| Small holes or damaged creases | Is damage limited to a barrier layer or through the laminate? | Unused film and handled finished packs | Packaging laboratory |
| Barrier result deteriorates | Were structure, conditioning and test conditions comparable? | Matched specimens tested on the same basis | Barrier laboratory |
| Weak or leaking seals | Is the defect in the seal, web or another feature? | Marked consecutive packs and retained film | Line and quality teams |
| Print scuffs or rubs | Which exposed surface is damaged, and when? | Unhandled sample and distribution sample | Converter and handling team |
| Problem starts with a roll change | What changed besides the roll? | Roll identity, machine record and retained packs | Joint supplier/line review |
Begin with a photograph that includes orientation and a sample identifier. A close-up without a location map can be difficult to compare with the next failure. For specification fields, use the film specification comparison guide.
Takeaway: Route the observed defect to a specific check before proposing a material change.
Preserve evidence before adjusting the process
Keep a short incident record: film supplier and lot, roll identity, approved structure revision, packing date, product, defect location, discovery stage and current machine recipe. Add the most recent accepted run. Record actual observations separately from proposed causes; “separation at the printed interface” is more useful than “bad adhesive” until the interface has been examined.
Collect examples that answer a question. If the symptom began after filling, compare unused material, empty converted packs and filled packs. If it appeared after distribution, retain the shipping configuration and record where the damaged packs sat. Do not discard the good comparison samples while keeping only dramatic failures.
Changes need a record too. List one intervention, its purpose, the samples produced and the result. If several adjustments are required together for safe operation, document them as a group and acknowledge that the trial cannot assign the result to one adjustment. The first-order risk checklist helps establish retained samples and acceptance records before a dispute occurs.
Takeaway: Keep a traceable accepted sample alongside the failure; an isolated defective pack cannot show what changed.
Curl: distinguish free-film shape from machine tracking
Curl is a laminate shape change; tracking is the web’s behavior while constrained by the machine. They can occur together, but a tracking adjustment alone does not explain why an unrestrained sample bends.
In his original Converting Quarterly technical column, Eldridge Mount describes curl driven by unbalanced layer dimensions. Lamination tension, temperature and moisture response can contribute. The direction and conditioning history of the sample therefore matter. This is a mechanism to investigate, not proof that a particular delivered roll was manufactured incorrectly.
Mark machine direction and the two faces before comparing samples. Ask the converter to define the sample preparation and conditioning procedure, then record whether the curl persists or changes. Send the same identified samples with the approved layer structure and storage history. An unlabelled curl photograph leaves too much room for conflicting interpretations.
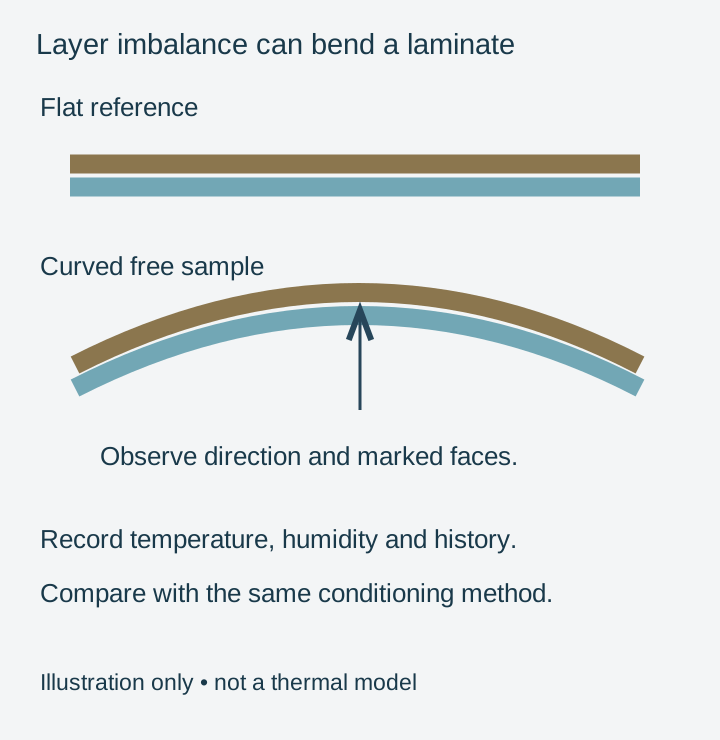
Avoid treating extra overall thickness as an automatic cure. First identify the structure and the observed change. If the free sample remains flat while the running web misbehaves, move to the equipment route: VFFS film or flow-wrapper film. Those pages cover format compatibility; this investigation preserves the material evidence they need.
Takeaway: Mark the layer faces and compare free samples under agreed conditions before changing the laminate.
Delamination: locate the failed interface
Layer separation needs an interface description. Identify which faces separated, whether printing moved with one face, and whether the change is confined to an edge, seal area or broader panel. Ask the converter to review the substrate, surface treatment, ink, adhesive and cure records appropriate to that construction. Do not prescribe a new adhesive ratio or cure schedule from appearance alone.
A packaging laboratory’s public guidance describes lamination bond testing as separating the relevant plies and measuring peel force; it also identifies static loading for questions involving long-term creep. Ask the laboratory to report the failure location and method with the result. A force reading detached from the specimen construction can conceal a change in what actually failed.
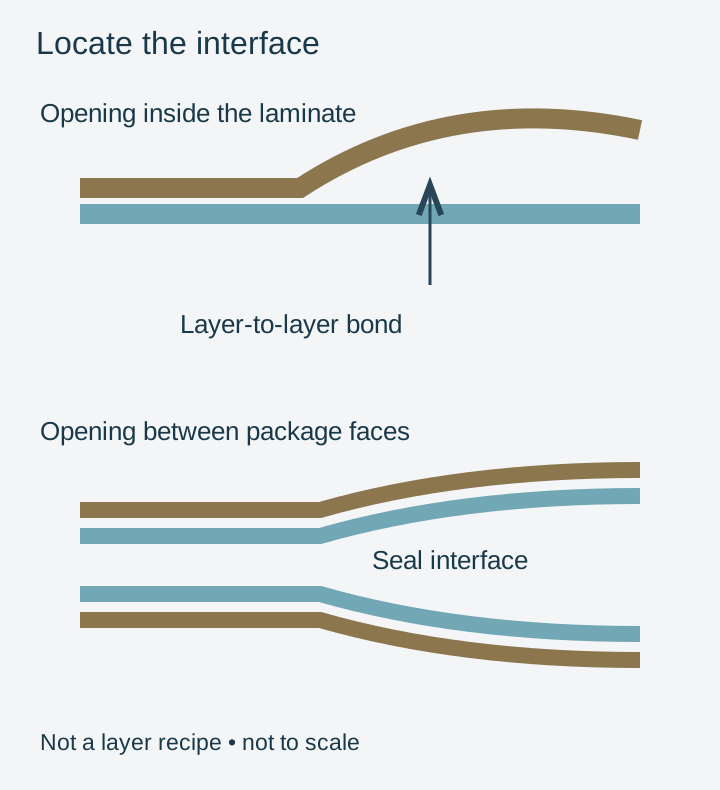
For a useful handoff, attach photographs of both separated surfaces, affected and acceptable lot references, and the stage at which separation first appeared. If the pack only changes after contact with the product or a processing step, include those conditions. The specialist can then choose representative exposure and bond checks instead of testing an unrelated clean sample.
Haze alone does not establish delamination. Preserve the sample and ask what observation would distinguish a bond problem from a change in an individual layer or its contents. Keep the result attached to the original symptom. A supplier’s general statement that a laminate is “suitable” does not resolve a documented failure on this package.
Takeaway: Identify the separated interface and test that bond; do not substitute a package-seal result.
Pinholes, flex damage and barrier loss require different checks
A hole through a complete package and damage confined to its barrier layer are different findings. The Sterilization Packaging Manufacturers Council explains this distinction for foil laminates. Its older technical FAQ is useful for that distinction; it is not a universal acceptance rule for today’s food packages.
The same laboratory’s flex guidance notes that damage to metallization, oxide coating or foil can impair barrier performance before a through-hole is visible. ASTM F392/F392M describes flex conditioning, with subsequent testing chosen to assess the relevant effect. A flex test label does not itself supply a pass criterion, and it does not cover every abrasion or puncture mechanism.
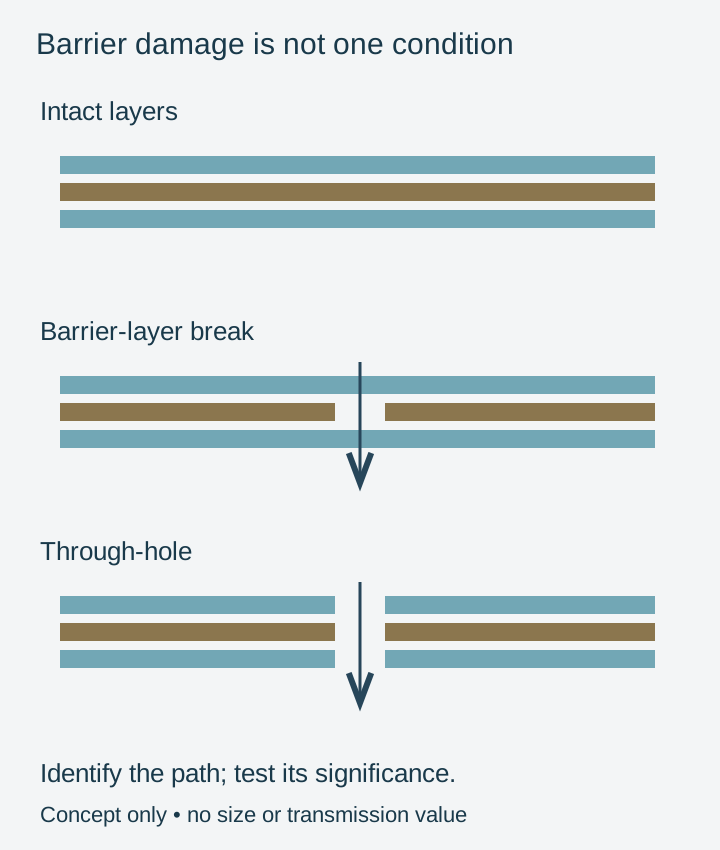
Ask the laboratory whether the question concerns an open leak, retained barrier after handling, or resistance to a particular mechanical exposure. Agree on the sample state and comparison before testing. For sharp-product damage, follow puncture resistance; for transmission through material, use OTR and WVTR.
EVOH adds another distinction: moisture exposure can increase its oxygen permeability. The research reviewed by Mokwena and Tang explains why processing and storage conditions matter. That does not make all EVOH-containing laminates unsuitable for humid use; the complete construction and intended exposure need evaluation. Compare reported conditions with the package’s actual route rather than treating a dry-film barrier value as a finished-pack guarantee.
Record specimen thickness and structure, temperature, humidity, conditioning, test method and whether the sample was flat, converted or previously stressed. If two results use different conditions, ask for a comparable test before concluding that the later roll is worse. A shelf-life concern may also require product and process investigation; a material transmission result alone cannot establish the cause.
Takeaway: Agree whether the test must detect a leak, material transmission or damage after handling.
Seals: map the pattern before blaming the film
A sealing-equipment specialist’s public guidance recommends collecting consecutive packs, marking direction and tracing intermittent defects to their position. Its troubleshooting guidance also identifies jaw condition, contamination, heat distribution and setup as possible contributors. Qualified personnel should perform equipment checks using the machine’s safe procedures; this page does not provide adjustment instructions.
Preserve the location of each failed seal: leading or trailing end, longitudinal seam, gusset transition, zipper or another feature. A repeated pattern can help the line team choose its next inspection. A random-looking pattern should be recorded as such rather than assigned to film quality without further evidence.
Keep three questions separate: was the seal formed under the agreed conditions, does it have the required strength, and is the package free of the relevant leak? Use seal strength for the mechanical test context and hot tack when the concern is the seal before it cools. A passing result in one category does not answer all three.
When a roll change is implicated, compare its approved identity and orientation with the accepted run. Record other simultaneous changes, including product, format and recipe. For a new structure, return to an agreed material trial rather than assuming the previous settings remain suitable. Route premade formats to premade-pouch materials.
Takeaway: Preserve the defect sequence and location so the line team can investigate a pattern.
Close the investigation with a checkable decision
Copy one record per incident. An improvement after several changes can justify further trials, but does not identify which change resolved the defect. Keep technical acceptance and material/product disposition separate.
Scroll horizontally to view all columns if needed. ↔
| Field | Record |
|---|---|
| Incident and sample / batch | ID, roll/lot, structure revision; affected and accepted samples: ____ |
| Observation and hypothesis | Location and discovery stage: ____; proposed cause: ____ |
| Check | Method, conditioning, comparison and acceptance criterion: ____ |
| Evidence | Result, photograph and report reference: ____ |
| Correction | Change, trial samples and approved action: ____ |
| Owner | Investigation and disposition responsibilities: ____ |
| Verification | Retest result; release decision; unresolved items: ____ |
| Follow-up | Review date and recurrence check: ____ |
Replacing a roll may restore production while the cause remains unresolved. Preserve both results in the record and use the film-selection checks if a change of structure is proposed.
Takeaway: Close the record with traceable evidence, an owner and a verification result.
Frequently asked questions
Why does a laminate curl after leaving the machine?
A free sample can respond differently after tension is released or its environment changes. Mark its direction and faces, then compare samples under an agreed conditioning procedure. The original technical discussion explains the possible layer imbalance; the observed curl alone does not identify which manufacturing step caused it.
What should I check when laminate layers lift?
Locate the separation first. Ask the converter to inspect the relevant substrate, printing, adhesive and cure records, then agree on bond testing using identified samples. Do not turn a generic list of possible causes into a fixed cure schedule for an unknown laminate.
Does a foil-layer pinhole mean the entire pouch has a hole?
No. A break confined to foil differs from a through-hole across the laminate. Appearance may not distinguish them reliably. Ask the laboratory to identify the damage path and determine its significance for the package’s barrier requirement; do not release the pack on that distinction alone.
Should a seal investigation compare every package or a sequence?
A numbered sequence makes intermittent patterns easier to preserve. Mark the direction and affected seal location. Retain acceptable packs within that sequence too: they help show whether the problem repeats at a position or appears irregularly. The quality team defines the sampling and acceptance plan.
Why can a laminated pack still show print scuffing?
First identify the damaged surface and whether the print is exposed or protected within the structure. Compare an unhandled sample with the damaged pack and record when the scuff appeared. Ask the converter to select a representative rub or handling assessment; “laminated” alone does not describe the abrasion exposure.
What information helps a supplier investigate a film problem?
Send the structure revision, roll and lot identity, sample labels, defect photographs, discovery stage and accepted comparison. Include actual processing and storage conditions and the tests already performed. State the question you want resolved, such as the failed interface or whether a leak extends through the complete laminate.
Methods and references
This is an editorial troubleshooting framework, not a laboratory report. Diagrams illustrate failure paths and contain no measured dimensions. No universal sealing temperature, cure duration, barrier target or defect rate is proposed. References reviewed October 9, 2026; the listed publication years are separate from this review date. Laboratory guidance describes test purposes, not a diagnosis of these samples. Machine adjustment and product disposition remain with the responsible teams.
- A sealing-equipment specialist: intermittent seal-quality troubleshooting: defect sequencing and equipment inspection context.
- Mount, Converting Quarterly, 2013 Quarter 4, “Substrate Secrets” column: original technical discussion of curl; the upload path is newer than the publication.
- A packaging laboratory: lamination bond strength and flex resistance: distinctions between bond, flex and barrier testing.
- ASTM F392/F392M-23 public scope: flex conditioning scope, not a reproduced test procedure.
- SPMC: foil-layer pinholes: 2009 technical FAQ; used for the distinction between layer damage and through-holes.
- Mokwena and Tang, 2012: EVOH moisture sensitivity and processing context.
Continue reading
Related articles

How to Choose Flexible Packaging Film: A Step-by-Step Selection Guide
An end-to-end engineering guide to selecting flexible packaging films: product barrier risks, machine kinematics, substrate structures, and trial verification protocols.
First-Order Risk Checklist for Printed Pouches and Rollstock
A compact checklist for controlling specification, payment, quality and shipment risk on a first order of printed pouches or rollstock.
How to Compare Flexible Packaging Film Specifications
Separate hard requirements from preferences, normalize units and test conditions, and compare the full package before choosing a film.